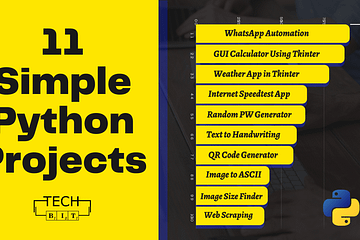
Disclaimer: I am using Python Programming Language in this tutorial. The library that I am using is “pywhatkit”.
I know we all have sailed the same boat at some point in our life. We are very well aware of the pressure that “Assignment Submission” put on us. And to make it even worse, when the assignment that is to be submitted needs to be handwritten.
In this short article, I have one ultimate solution for you all who are in desperate search of some magic to make this work easy. If you are a little aware of programming or even if you aren’t, this will work for you with just a little effort.
I am using Python Programming language. The library that helps in achieving this task is “pywhatkit“. It is a very useful library with many useful and fun features. An extremely straightforward piece of code is required to accomplish such a nerve-wracking task and to save time.
How to get started with pywhatkit in Python?
- So simply head into your code editor environment, make a folder and a file inside with a .py extension.

- Now click on the topmost triangle-shaped arrow to open the “Terminal”.
- Once the terminal pops up, type the command “pip install pywhatkit” to install this library.
pip install pywhatkit
- Now import the library. For the same, just type in “import pywhatkit”.
import pywhatkit
- Now we will use the following function to convert our text to handwritten characters.
pywhatkit.text_to_handwriting()- Simply add your text into the parenthesis which is enclosed by triple quotes. Here I have used some excerpt text from one of my previous articles.
pywhatkit.text_to_handwriting(''' TypeScript is an advanced programming language. It is based on JavaScript primarily. TS is an Object-Oriented Programming Language. Along with its development in 2012, Microsoft is still responsible for maintaining it.

If you lend up on this page, I assume that you have some previous knowledge of programming. I am not expecting you to directly build a web application or something. The only thing I am expecting from you is you know where to write your code exactly. No doubt you will better understand this if you have some basic working knowledge of JavaScript.''', rgb=(0,0,255))
- Run the python file in the terminal again and wait for the magic to happen. Follow down the path of your current folder and you will have your .png file.


So here you have it now. This is not at all a time-consuming task and is highly efficient in doing the work. I highly recommend you to try it out once. To sum up, if you are a beginner in python programming, you will be amazed to see the wonders that the python language is capable of doing. Make sure to share this article with the right audience. As it gives me the motivation to bring such useful content more.
Check out my other articles here.


12 Comments
Hemraj · May 28, 2021 at 1:38 pm
Amazing. I’ve been working with various libraries of pypi but this is really amazing
Vaishali Rastogi · May 28, 2021 at 5:33 pm
Thank you so much Hemraj!
Riya Sharma · May 29, 2021 at 10:57 am
This is nice. Keep up the good work. Wish to see more of this stuff ahead.
Vaishali Rastogi · May 29, 2021 at 4:21 pm
Thank you so much!
Already working on more such pieces.
Ranjit Nayak · May 29, 2021 at 12:08 pm
Thts so cool.
Vaishali Rastogi · May 29, 2021 at 4:23 pm
Thank you so much!
Please check out my other articles too.
Abhishek · June 4, 2021 at 6:56 am
This one is quiet interesting and helpful. Thanks!
Vaishali Rastogi · June 4, 2021 at 6:57 am
Thank you 🙂
Abhishek · June 18, 2021 at 12:30 pm
Very interesting, to know about pywhatkit lib
Vaishali Rastogi · June 18, 2021 at 12:32 pm
Thank you so much, Abhishek.
Aplikator ACP · March 13, 2022 at 3:16 pm
Hi there, I enjoy reading through your article. I like to write a little comment to support you.
Vaishali Rastogi · March 14, 2022 at 11:12 pm
Thank you so much!